
Before Getting Started - Are You Allowed to Grow Marijuana?
In recent years, more and more states in the US are open to cannabis cultivation, catering to both medical and recreational purposes. In addition to the US, regions worldwide are also catching up, say, Germany legalized weed cultivation in 2024. While the regulations have eased up, situations for cannabis home growing can be quite different given where you are located. Some regions allow for personal cultivation, while others have strict penalties.

Therefore, before hands down growing cannabis at home, it’s essential to understand your local laws and comply with them. Growing marijuana illegally can result in severe consequences, such as hefty fines or criminal charges.
6 Factors Determining a Successful Marijuana Growing
Growing marijuana is never a one-sided success. It requires all sorts of efforts together to reach the end. To enjoy a bountiful harvest, you have to look out for:
Light
Cannabis plants require different growth light spectrums and intensities at various growth stages. For example, during the vegetative stage, they prefer more blue light with low to mid-intensity. In the flowering stage, they need red light with higher intensity. What’s more, the lighting schedule also varies as the plants grow.
Air
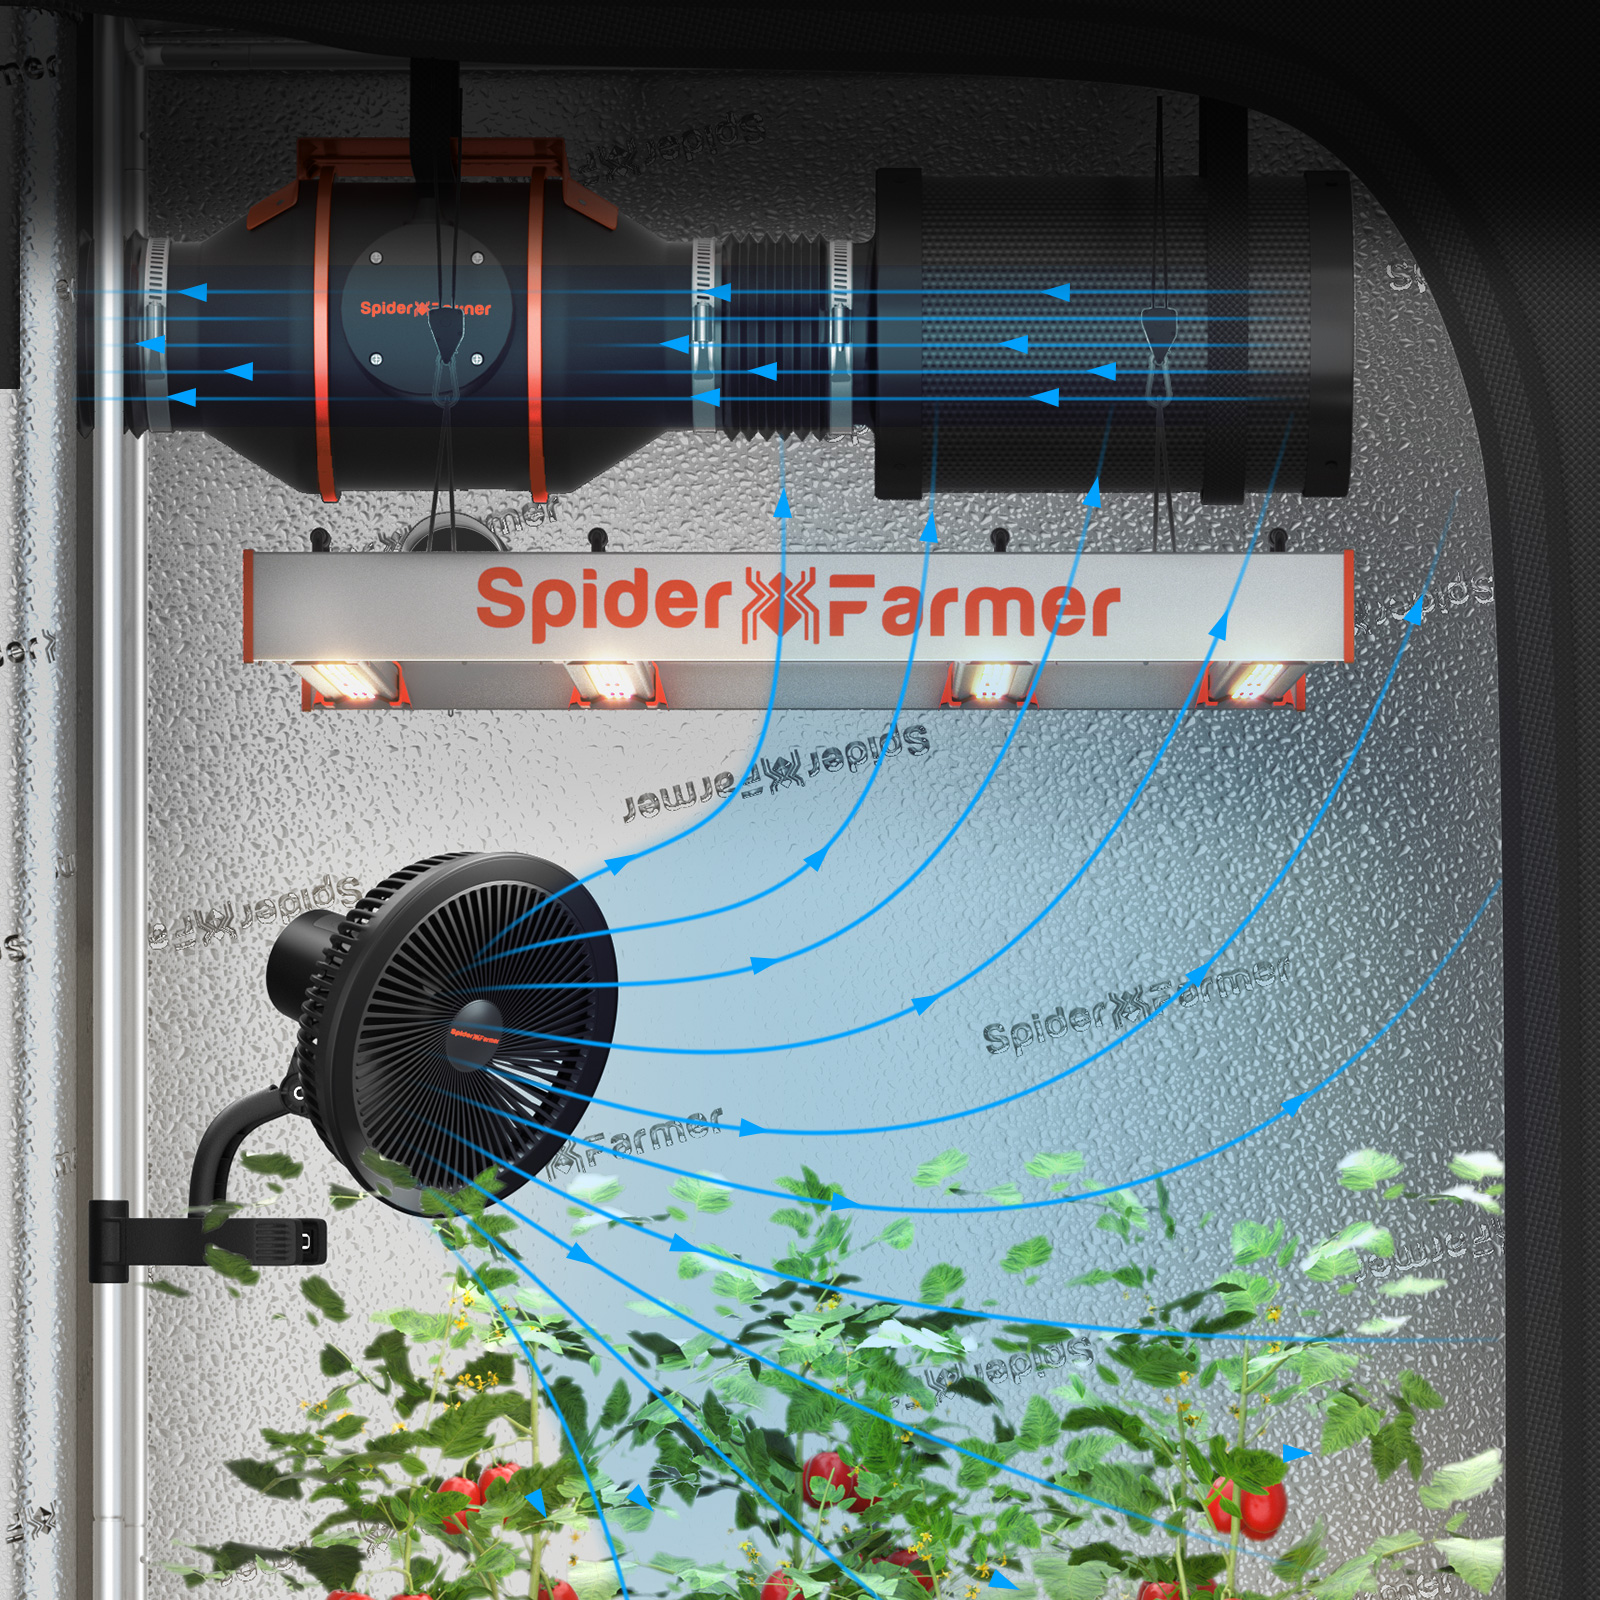
A well-ventilated space with good air circulation is crucial. A mild breeze can strengthen plant stems and reduce the risk of mold and pests. That’s why many indoor weed growers use inline fans and an exhaust system can help maintain good airflow and control humidity levels.
Growing Medium
You have to pick a medium in which the cannabis plant grows. Soil-based growing is common, but hydroponics are gaining popularity as well.
Temperature
Cannabis plants thrive in temperatures that are comfortable for humans, typically between 70-85°F (20-30°C) during the day and slightly cooler at night. When growing weed outdoors, it’s very important to avoid temperature extremes, as both high heat and cold can stress the plants and inhibit growth. For indoor weed growing, temperature control can be much easier to handle.
Water
Water is essential for plant growth. Ensure your water source is free from contaminants. Tap water can be used if it’s of good quality, but consider filtering it if necessary.
Nutrients
Cannabis plants require nitrogen (N), phosphorus (P), and potassium (K) in different ratios throughout their growth cycle. Pre-made cannabis fertilizers can simplify feeding. In addition to macronutrients, cannabis also needs micronutrients such as calcium, magnesium, sulfur, iron, and zinc.
As your weed plants go through different growth stages, the leading factors can vary. Below is a summary of the suggested optimal growing conditions for each stage.
How Long Does It Take to Grow Weed
The time it takes to grow weed from seed to harvest varies depending on several factors, including the strain, growing conditions, and cultivation methods. Generally, you can expect the entire weed cultivation to take anywhere from 6 to 16 weeks (grown with Spider Farmer). Considering most home growers prefer the Sativa strain, which is a better option for recreational smoke, the process often takes 10-16 weeks.
Here’s a breakdown of the different weed growth stages and their typical durations. The timeline is pretty much a thumbnail of how to grow weed.

Setting Up Your Grow Space
Now let’s move to the growing environment, including whether you grow marijuana indoors or outdoors, the equipment needed for growing weed, and the growing medium.
Indoor vs. Outdoor Growing
Indoor Growing
Growing cannabis indoors gives you absolute and complete control over the growing environment. For most home growers, especially beginners, weed cultivation often occurs in a grow tent. Indoor weed growing allows you to adjust light, temperature, humidity, air circulation, and every facet to create optimal conditions for your marijuana.

Advantages:
- Complete control over the growing environment
- Year-round growing potential
- Protection from pests and harsh weather
- A wider variety of strains can be grown indoors
Disadvantages:
- Higher initial setup costs, including the lights, grow tents, grow rooms, etc.
- Electricity usage for grow lights and the ventilation system
Outdoor Growing
Outdoor marijuana growing utilizes natural sunlight and can be more cost-effective since it requires less equipment. However, it also means it’s more susceptible to environmental variables such as weather conditions, pests, and potential theft. For beginners, things can get out of control due to unpredictable outdoor conditions, yet you are unprepared for that. So if you are a first-time weed grower, go for indoor cultivation.
What Indoor Grow Light to Choose
For anyone aiming for successful indoor weed growing, the most important item lies in the grow light. While there are quite a few grow light types, 3 of them are dominating the game. They are LED grow lights, fluorescent lights, and HID lights.
LED Grow Lights
LED grow lights, particularly full-spectrum LED grow lights, have undergone significant technological research and development over the past decade. They are undoubtedly the most advanced grow lights so far and even continue to evolve, as manufacturers refine their LEDs through extensive testing with live cannabis plants.
They are given high credit due to their numerous advantages over traditional lighting systems. These lights, with high energy efficiency, low heat output, and a prolonged lifespan, should be the first that comes into your mind when selecting a grow light for indoor weed growing.

insta: stacksfarms, growing with Spider Farmer SF2000
In case you don’t know how to choose:
Best Grow Lights for Indoor Plants in 2024
HID Lights (MH & HPS Grow Light)
HID lights, mainly including Metal Halide (MH) and High-Pressure Sodium (HPS), have been a staple in indoor cannabis cultivation for many years due to their high light intensity and low prices. These lights are highly effective for growing cannabis by delivering a powerful and intense light output.
However, higher-wattage HID lights tend to generate a lot of heat and can significantly increase your electricity bill, especially when compared to how much LED lights cost. Additionally, you have to deal with a significant amount of heat when using HID grow lights.
HPS vs LED: Which Is Better for Growing Weed
Fluorescent Grow Lights
Fluorescent grow lights are a budget-wise lighting option for those starting out or working with limited indoor space. They are typically designed for seedlings and plants that require lower light intensity than cannabis. If you decide to use fluorescent lighting for cannabis growing, you still have high-output options such as the T5 grow lights in this category.
However, due to the limited light intensity and diffused coverage, fluorescent grow lights can hardly handle the cannabis flowering stage, which leads to short cannabis plants and unsatisfying bud yields. It has been tested that fluorescent lights produce only 1/4 to 1/2 the yields per watt compared to LED grow lights. Last, similar to HID grow lights, the heat output is also a problem.
Confused by all the lighting options? We’ve selected the best LED grow lights for common sizes of grow tents:
2x2 grow tent:
SF1000 Samsung LM301H EVO LED Grow Light
SF1000D 100W Full Spectrum LED Grow Light
2x4 grow tent:
G4500 430W Dimmable Full Spectrum LED Grow Light
SF2000 Samsung LM301H EVO LED Grow Light
SF300 33W Led Grow Light For Veg
3x3 grow tent:
G3000 300W LED Grow Light for 3X3
SF2000Pro Samsung LM301H EVO LED Grow Light
SE3000 Samsung LM301B Diodes For 3x3FT
4x4 grow tent:
G5000 480W Commercial LED Grow Light
SF4000 450W Samsung lm301H EVO LED Grow Light
SE5000 480W LED Grow Lights Dimmable for 4x4FT
Growing Medium for Cannabis
You may be familiar with soil, but in addition to that, there are actually soilless growing mediums you can use for cannabis growing. Here’s an overview of the most popular growing mediums, along with their pros and cons:
Soil
Soil is the most traditional and widely used growing medium for growing pretty much anything, largely because it is readily available and naturally contains nutrients. Growing cannabis in soil often results in plants with richer flavors and aromas. For beginners, high-quality potting soil is a straightforward and effective choice. Opt for top brands with ideal soil mixes that include components like earthworm castings, alfalfa meal, and humic acid. Then you can have an easy start.
Hydroponics vs Soil: Is Hydroponics Better?
Soilless Mediums
Soilless mediums, including coco coir, perlite, and vermiculite offer a great alternative to traditional soil and can lead to faster growth and larger yields. The biggest drawback of these mediums is that they do not contain nutrients, so you’ll need to provide them through nutrient solutions.
Hydroponics
Hydroponics requires a specific hydroponic system setup such as Spider Farmer G12 Indoor Hydroponic Grow System to kick off. It involves growing plants in a nutrient-rich water solution rather than soil. This method can result in extremely fast growth and high yields but requires careful management of nutrients and pH levels. If not, you are likely to encounter waterborne diseases and root rot.
So far, you should have a clear picture of your growing setup. In the following tutorials, we will show you how to grow weed in soil with Spider Farmer LED grow lights. Collect your items and let’s start!
Stage 1: Germinating Cannabis Seeds
Germination is the first step in growing your weed. Once you select the desired strain, you can germinate cannabis seeds in typically two ways - either using a paper towel or germinating seeds directly in the soil. Or, you can take a much more effective approach, that is using the Spider Farmer Waterproof Seedling Heat Mat for weed germination.
The ideal temperature for cannabis seeds to sprout is between 74-78°F(23-26°C). By providing a consistent and controlled heat source for your weed seeds, this heating mat significantly enhances root development and accelerates the germination process. With about 7 days or less, you can expect the seeds to sprout up and become marijuana seedlings.
If you are new to weed germination, check our full guide on it: How to Germinate Weed Seeds
Stage 2: Transplanting Cannabis Seedlings to Pot
Once your cannabis seeds have developed into healthy seedlings, which showcase several sets of small round leaves (cotyledons), it’s time to transplant them into pots or grow bags and place them in a grow tent.
First, fill the pots with a high-quality potting mix and water the soil before transplanting the seedlings. Then place each seedling into its new pot, covering the root ball completely with soil. The rest is to let the grow lights shine.

During the seedling stage, which normally lasts 2-3 weeks, you should have the grow lights on for 18 hours, with 6 hours of rest. Position your grow lights, such as the Spider Farmer SF2000 LED Grow Light, at the recommended height (24-30 inches)above the seedlings to ensure they receive adequate light for continued growth.
Don’t know how far to hang the lights from your plants? Check on our grow light distance chart.
Stage 3: Elevating Vegetation with Multiple Growing Techniques
Your weed plants should keep growing till stepping into the veg stage, where abundant green leaves and a thicker stem emerge. During the vegetative stage, which typically lasts around at least 4 weeks, growers can use techniques like topping, Low Stress Training (LST), pruning, SCROG, and lollipopping to shape the plant, control its size, and therefore, reduce the risk of moldy weed and establish a strong foundation for future flowering and bud production.
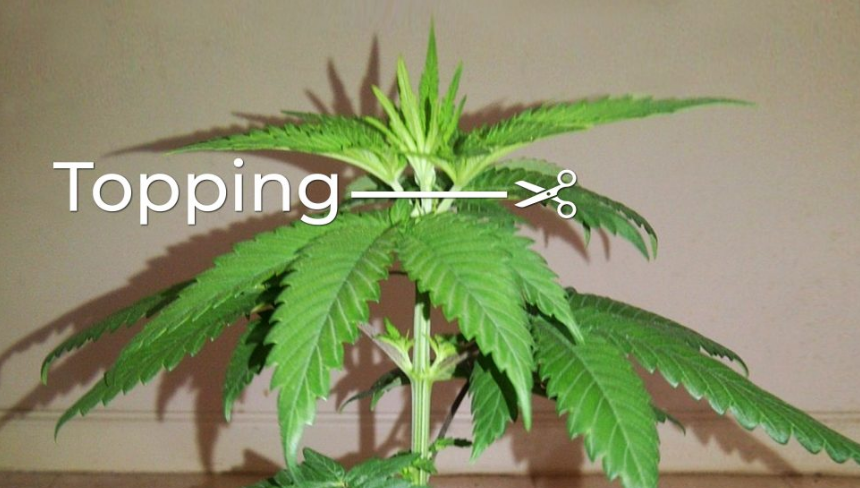
top weed the plants
Since it’s a stage of rapid growth, your plants need a lot of light to support their growth. When using Spider Farmer LED grow lights, most growers apply an 18/6 light cycle with a PPFD range of approximately 400-600 µmol/m²/s. Regarding the nutrients, the soil mix should be doing fine now, so you don’t have to worry about nutrient deficiency yet, unless they are showing signs such as lower cannabis leaves turning lime or falling off.
Stage 4: Nutrients and Lighting for the Flowering Stage
Here we are - the flowering stage is critical for bud development and typically lasts 7-10 weeks. The first 1-2 weeks of flowering, which is called the pre-flowering stage, showcases gender-specific signs - is your weed plant female, male, or hermaphrodite?
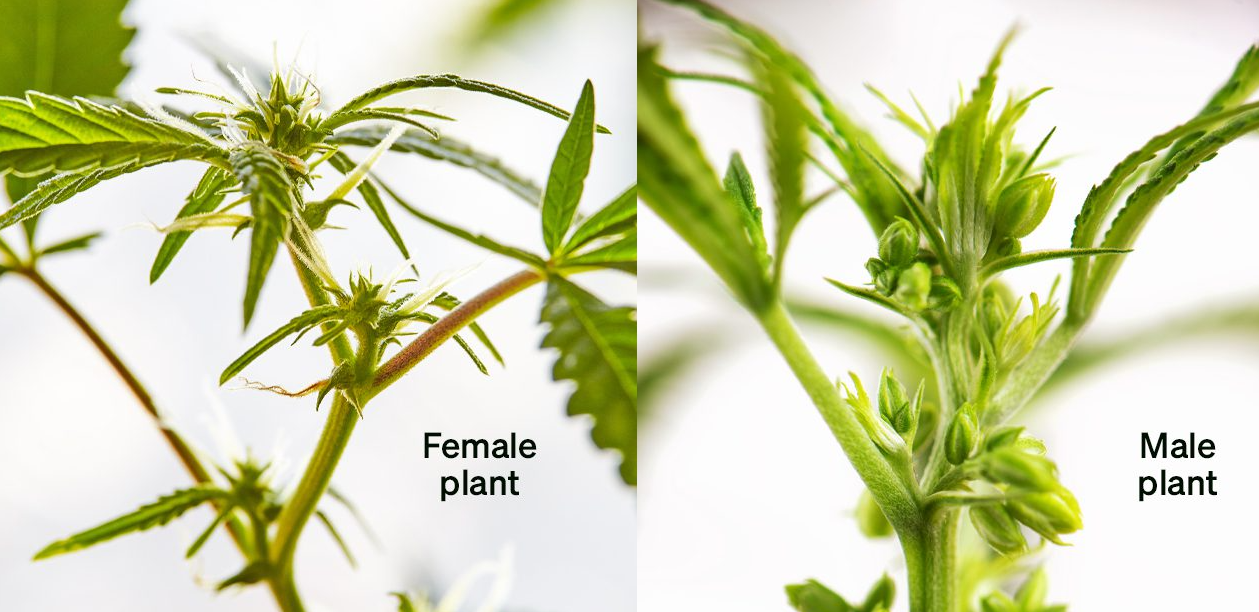
Female cannabis plants produce the buds that are harvested and consumed. Unfortunately, the chance of female and male cannabis plants is 50/50, unless you purchase feminized seeds in the first place. If your plants develop small, white, hair-like structures called pistils at the nodes, lucky you, they are female cannabis!
Is there a way to identify a female seed? Click here to know the answer.
Male cannabis plants, on the other hand, produce pollen sacs, which are small, round balls at the nodes. Male plants do not develop psychoactive properties like female plants do in their flowers. Additionally, male plants can pollinate your female plants, causing them to produce seeds instead of high-quality buds. Frankly speaking, you won’t want them.
Sometimes, plants can develop both male and female characteristics, usually due to stress. Hermaphrodites can self-pollinate and pollinate other female plants, reducing the quality and yield of your harvest. It's essential to remove them if detected. We also have an article explaining how to turn a hermie back into a female.
Once entering the real flowering stage, keep an eye on the nutrients. Cannabis plants are heavy feeders, and by the time budding starts, your plants will have depleted most of the nutrients in the soil and soon start to undergo cal-mag deficiency. Even if you begin with amended soil for cannabis, it’s essential to start adding nutrients when your plants show signs such as cannabis leaves curling up.
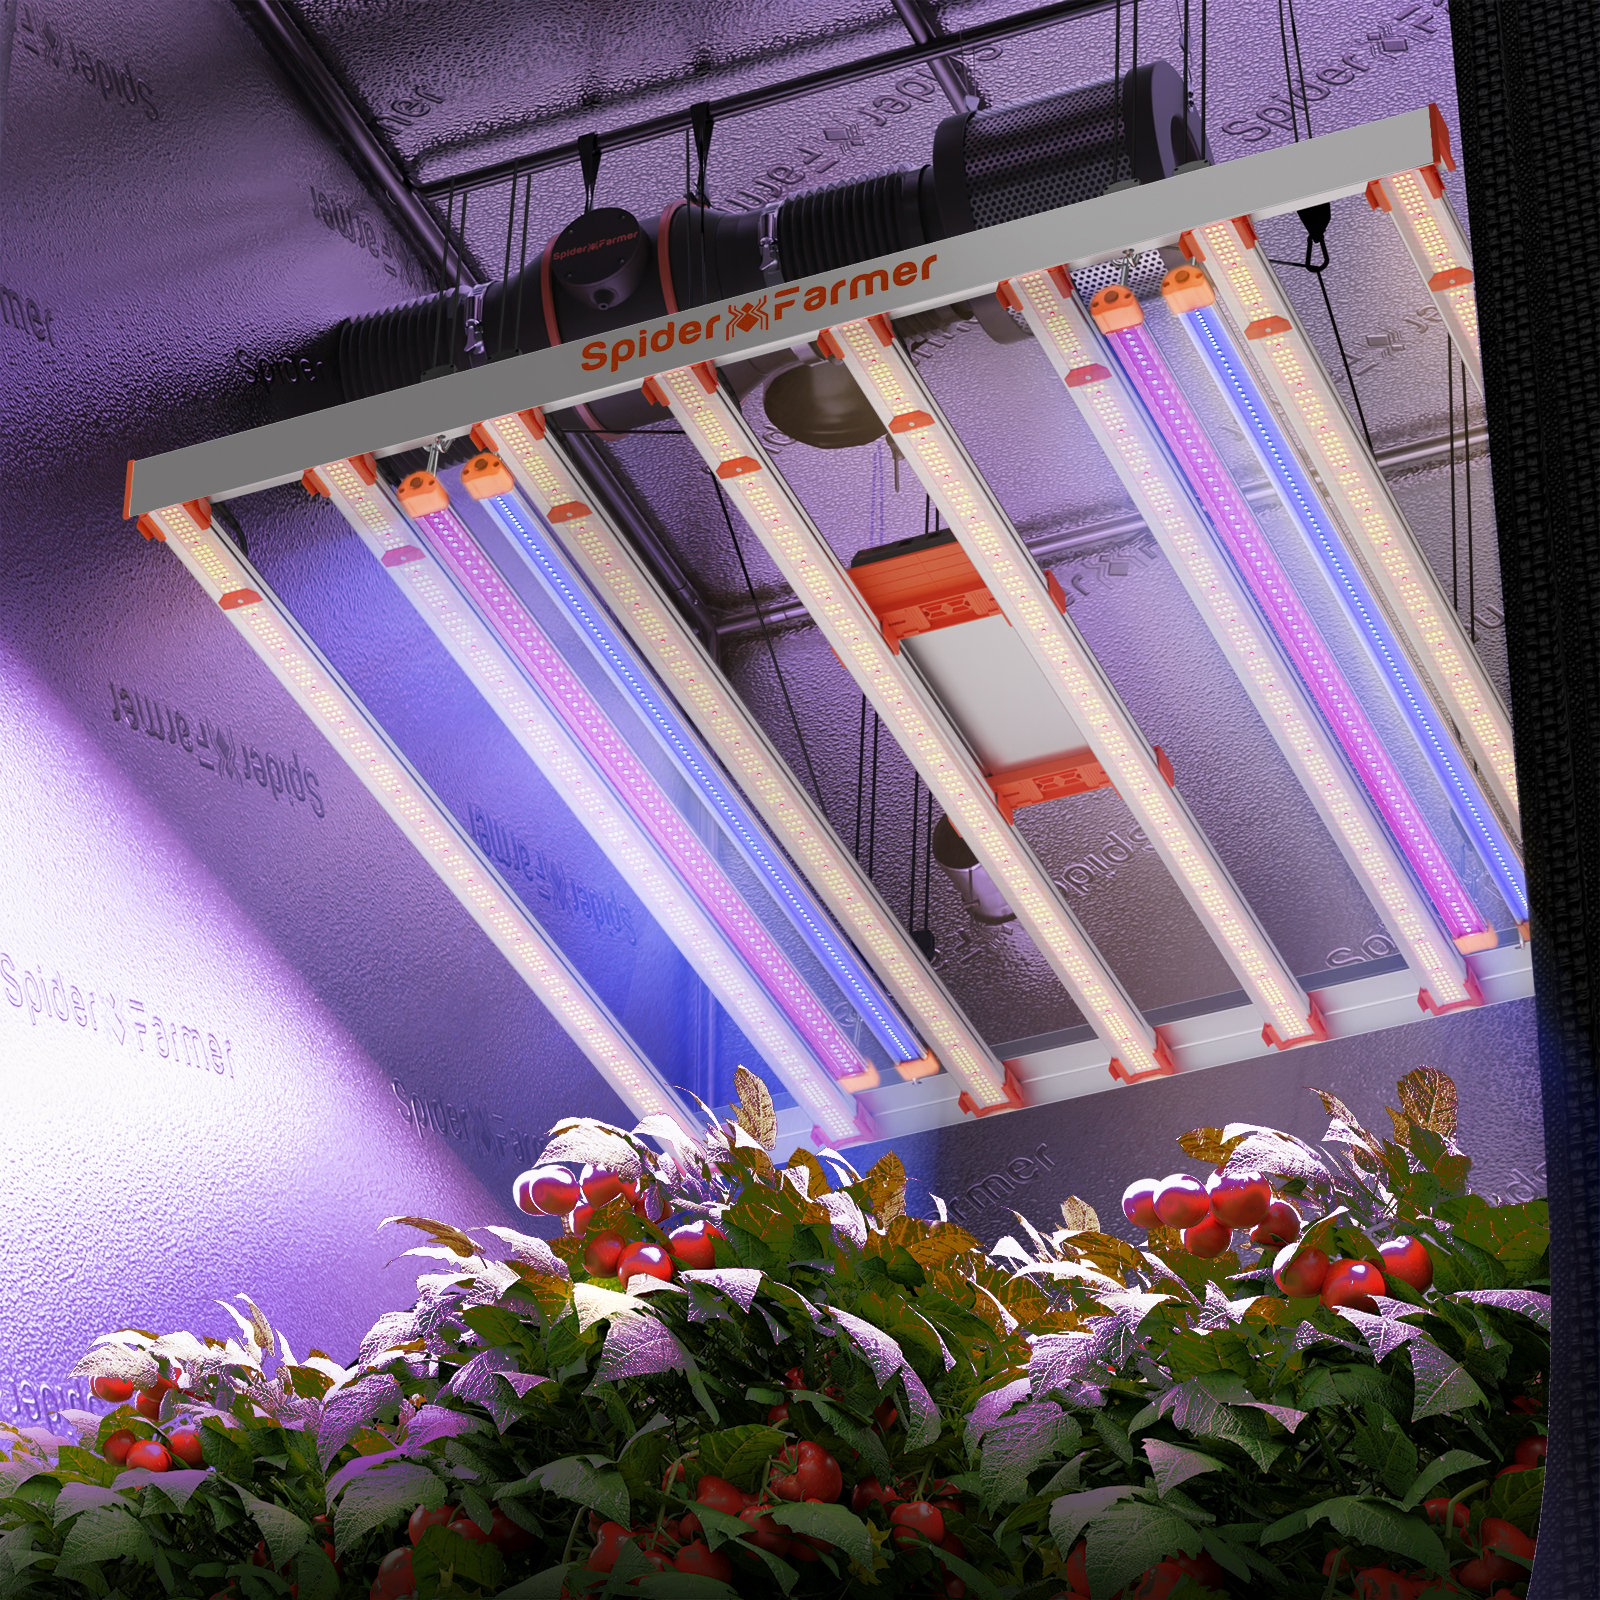
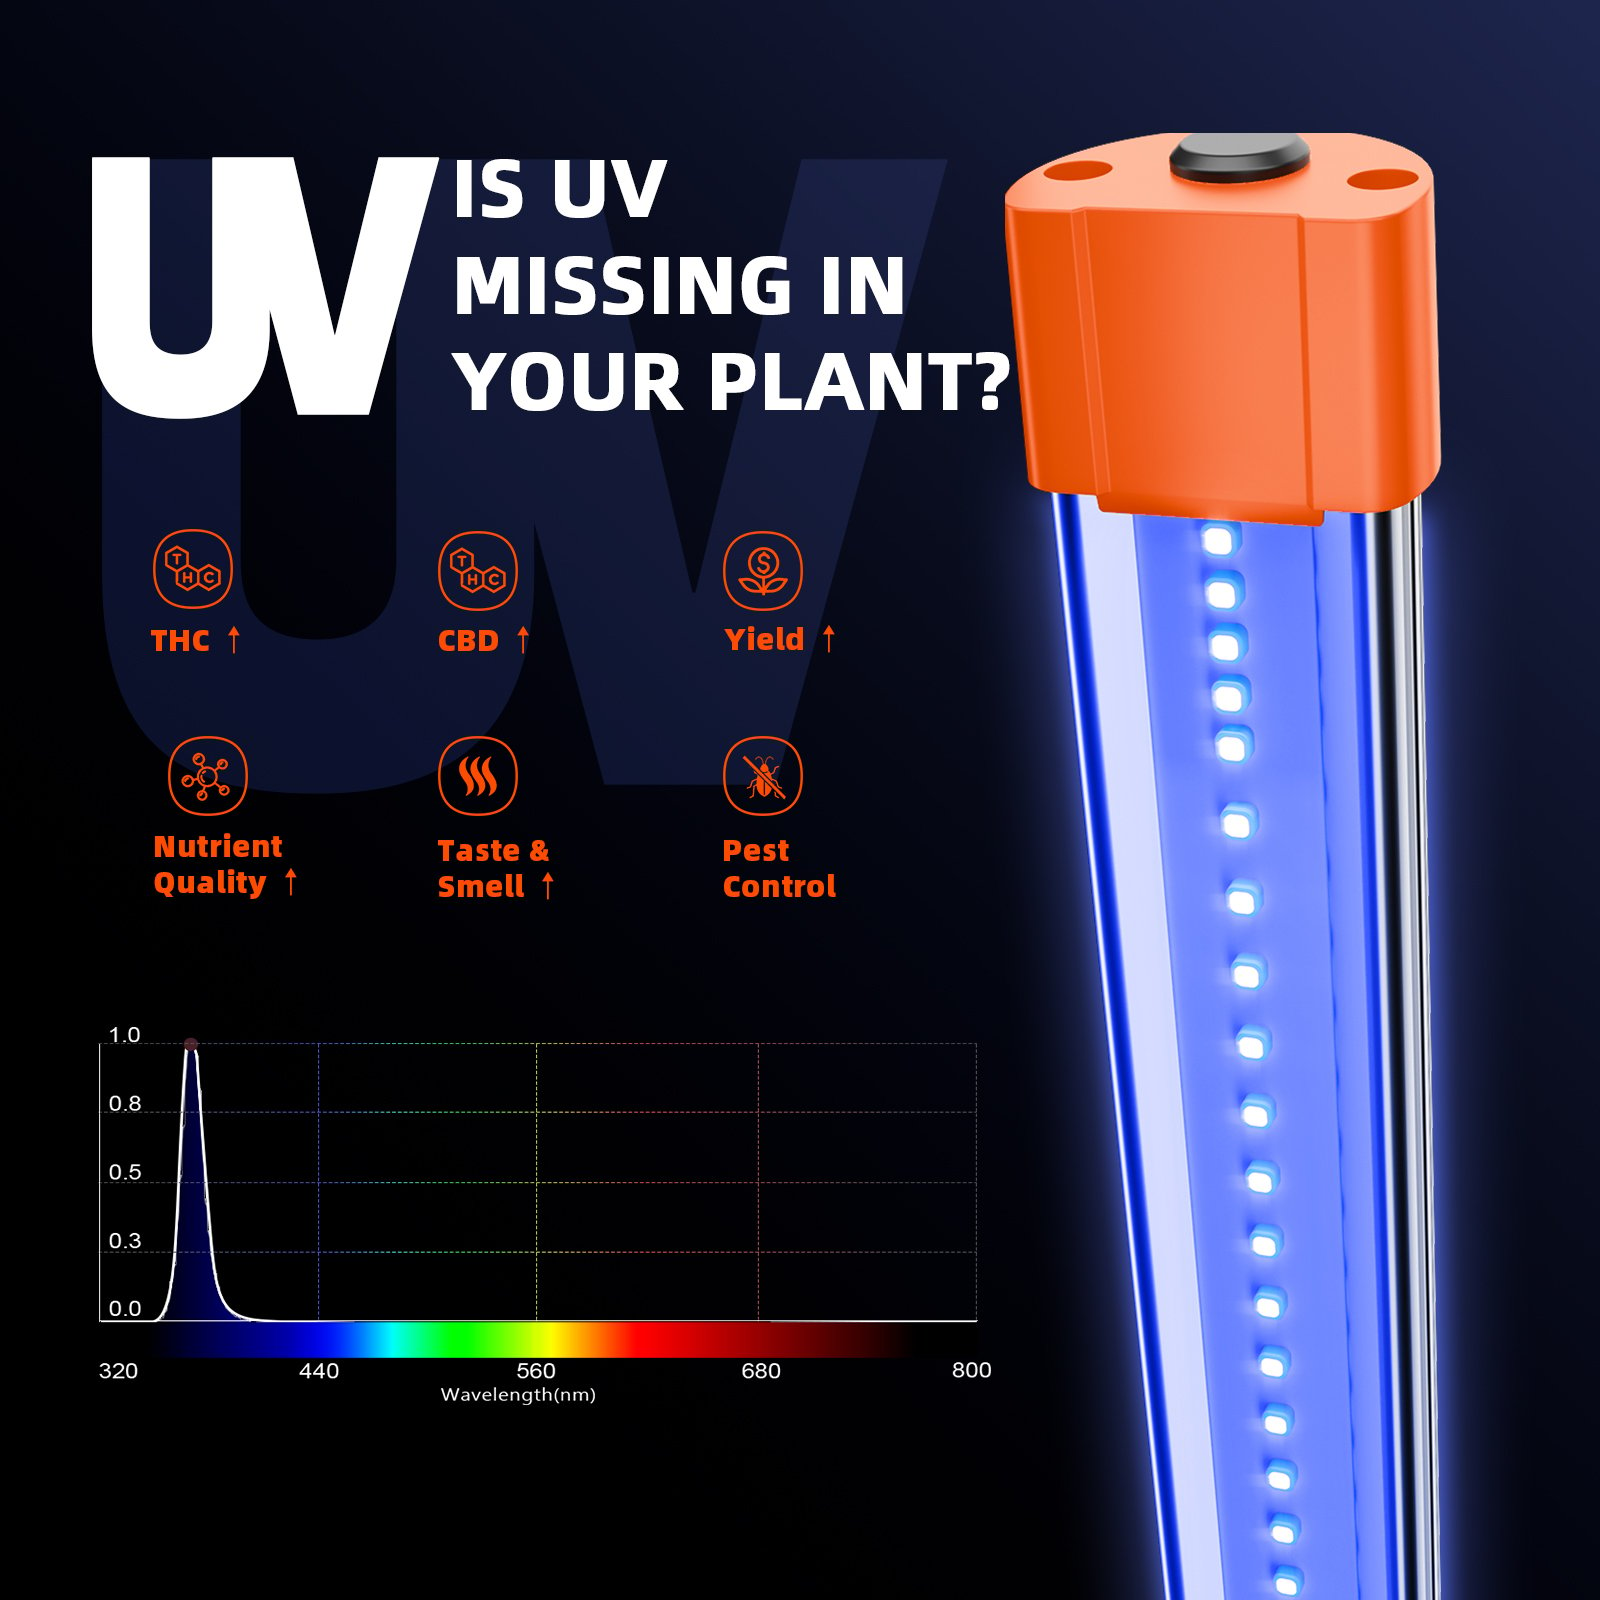
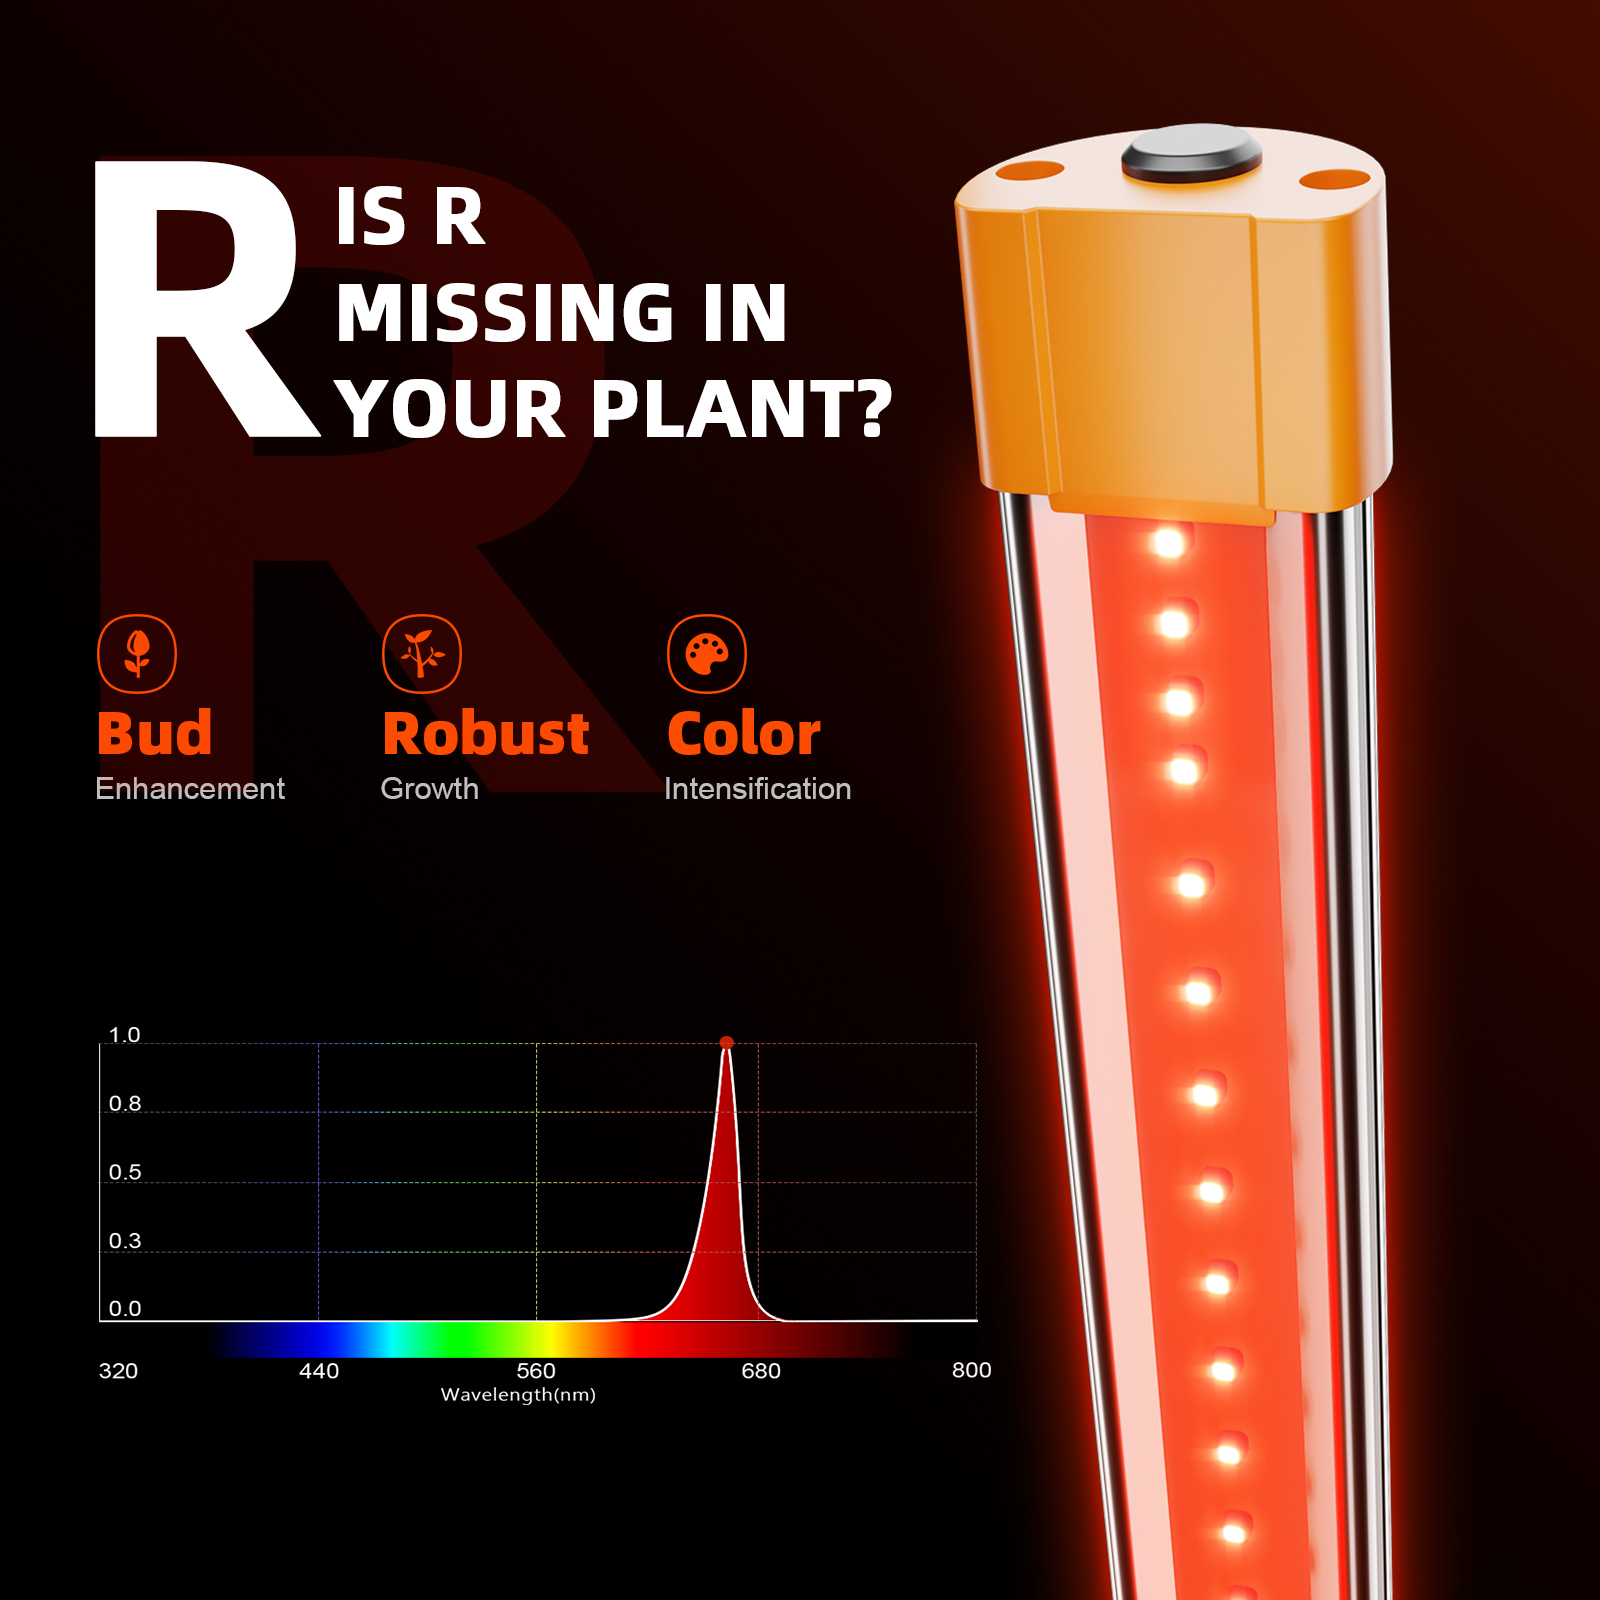
2024 Spider Farmer UV & IR Supplemental LED Grow Light Bars Set for Plants (35.4”)
In some main light sources, a few 365 UV diodes and 730nm IR diodes may just be a marketing gimmick, and in reality, their intensity may be insufficient. Among all the supplemental light bars in our lineup, the supplementary light bars in the Supply series feature the most densely arranged diodes, specifically designed to enhance weed growth. Our 35.4-inch(90cm) UV & Infrared Red light bar set consists of 4 bars, each UV light bar equipped with a durable and sturdy metal casing and 120 diodes, while each infrared red light bar equipped with a durable and sturdy metal casing and 88 diodes.
Why use 730nm IR supplemental light bar? Stem Boost, Flower Induction, Light-induced Sleep
Why use 365nm UV supplemental light bar? Boost THC/CBD, enhance yield, improve nutrients, elevate taste/aroma, sterilize grow area (eliminating mold), aid pest control.
UV Usage Tips: Utilizing the UV grow light during the final three weeks of flowering for up to two hours per light cycle.
IR Usage Tips: 15 minutes before the main light switches on and 15 minutes after it turns off.
Length of wires at both ends of a single light bar: 73cm/28.74''Package contents: 2 x UV light bars (length: 35.4''/ 90cm) 2 x Infrared Red light bars (length: 35.4''/ 90cm) 2 x Power Cord (length: 60''/ 150cm) 8 x YoYo hangers 20 x cable ties (for securing power cords)
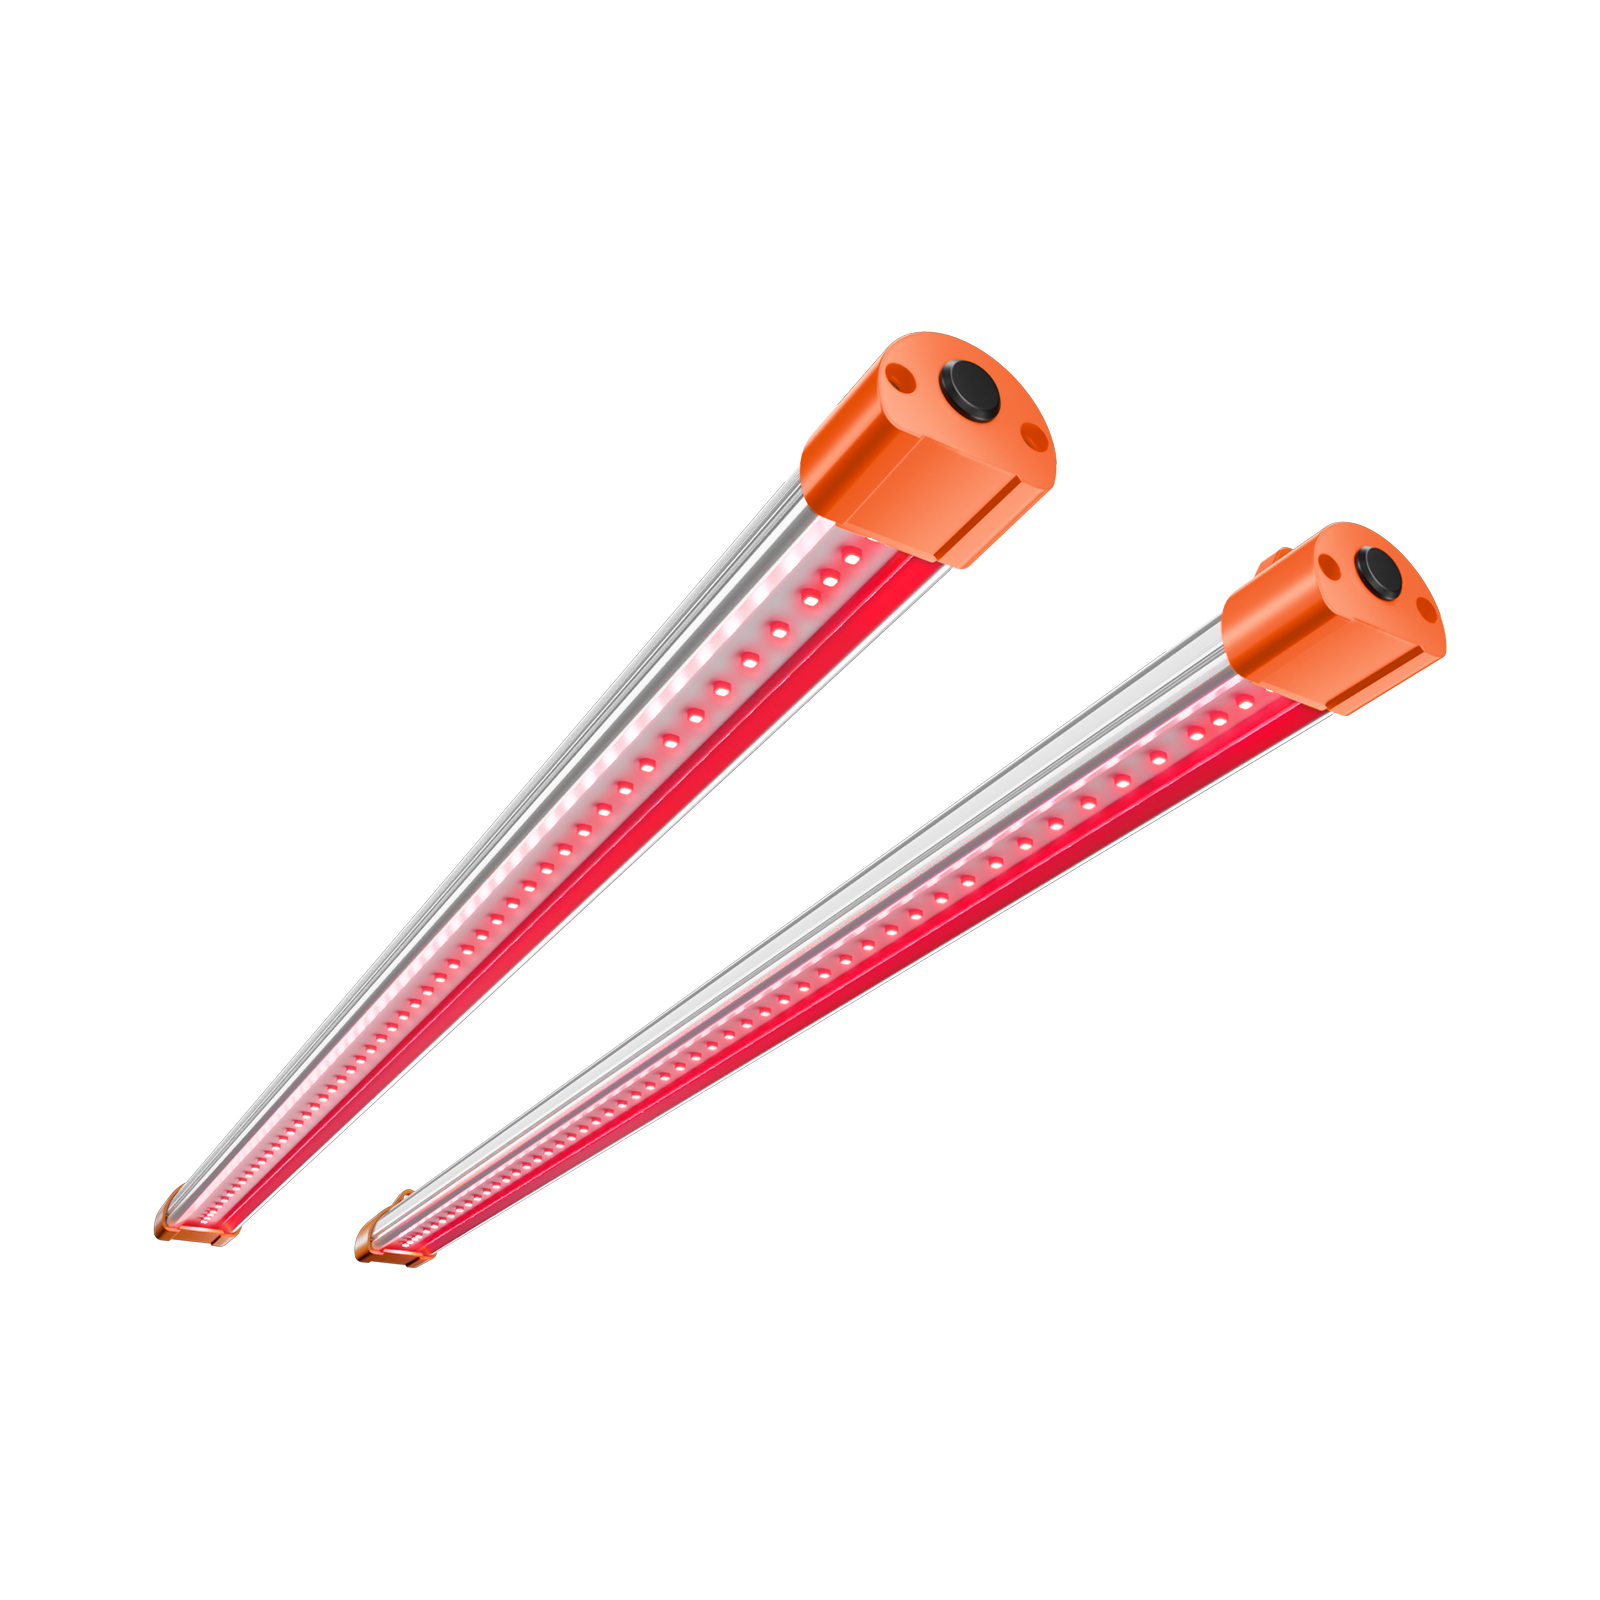

2024 Spider Farmer® Supplemental 730nm IR16 LED Light Bar Set for Plant (23.6” )
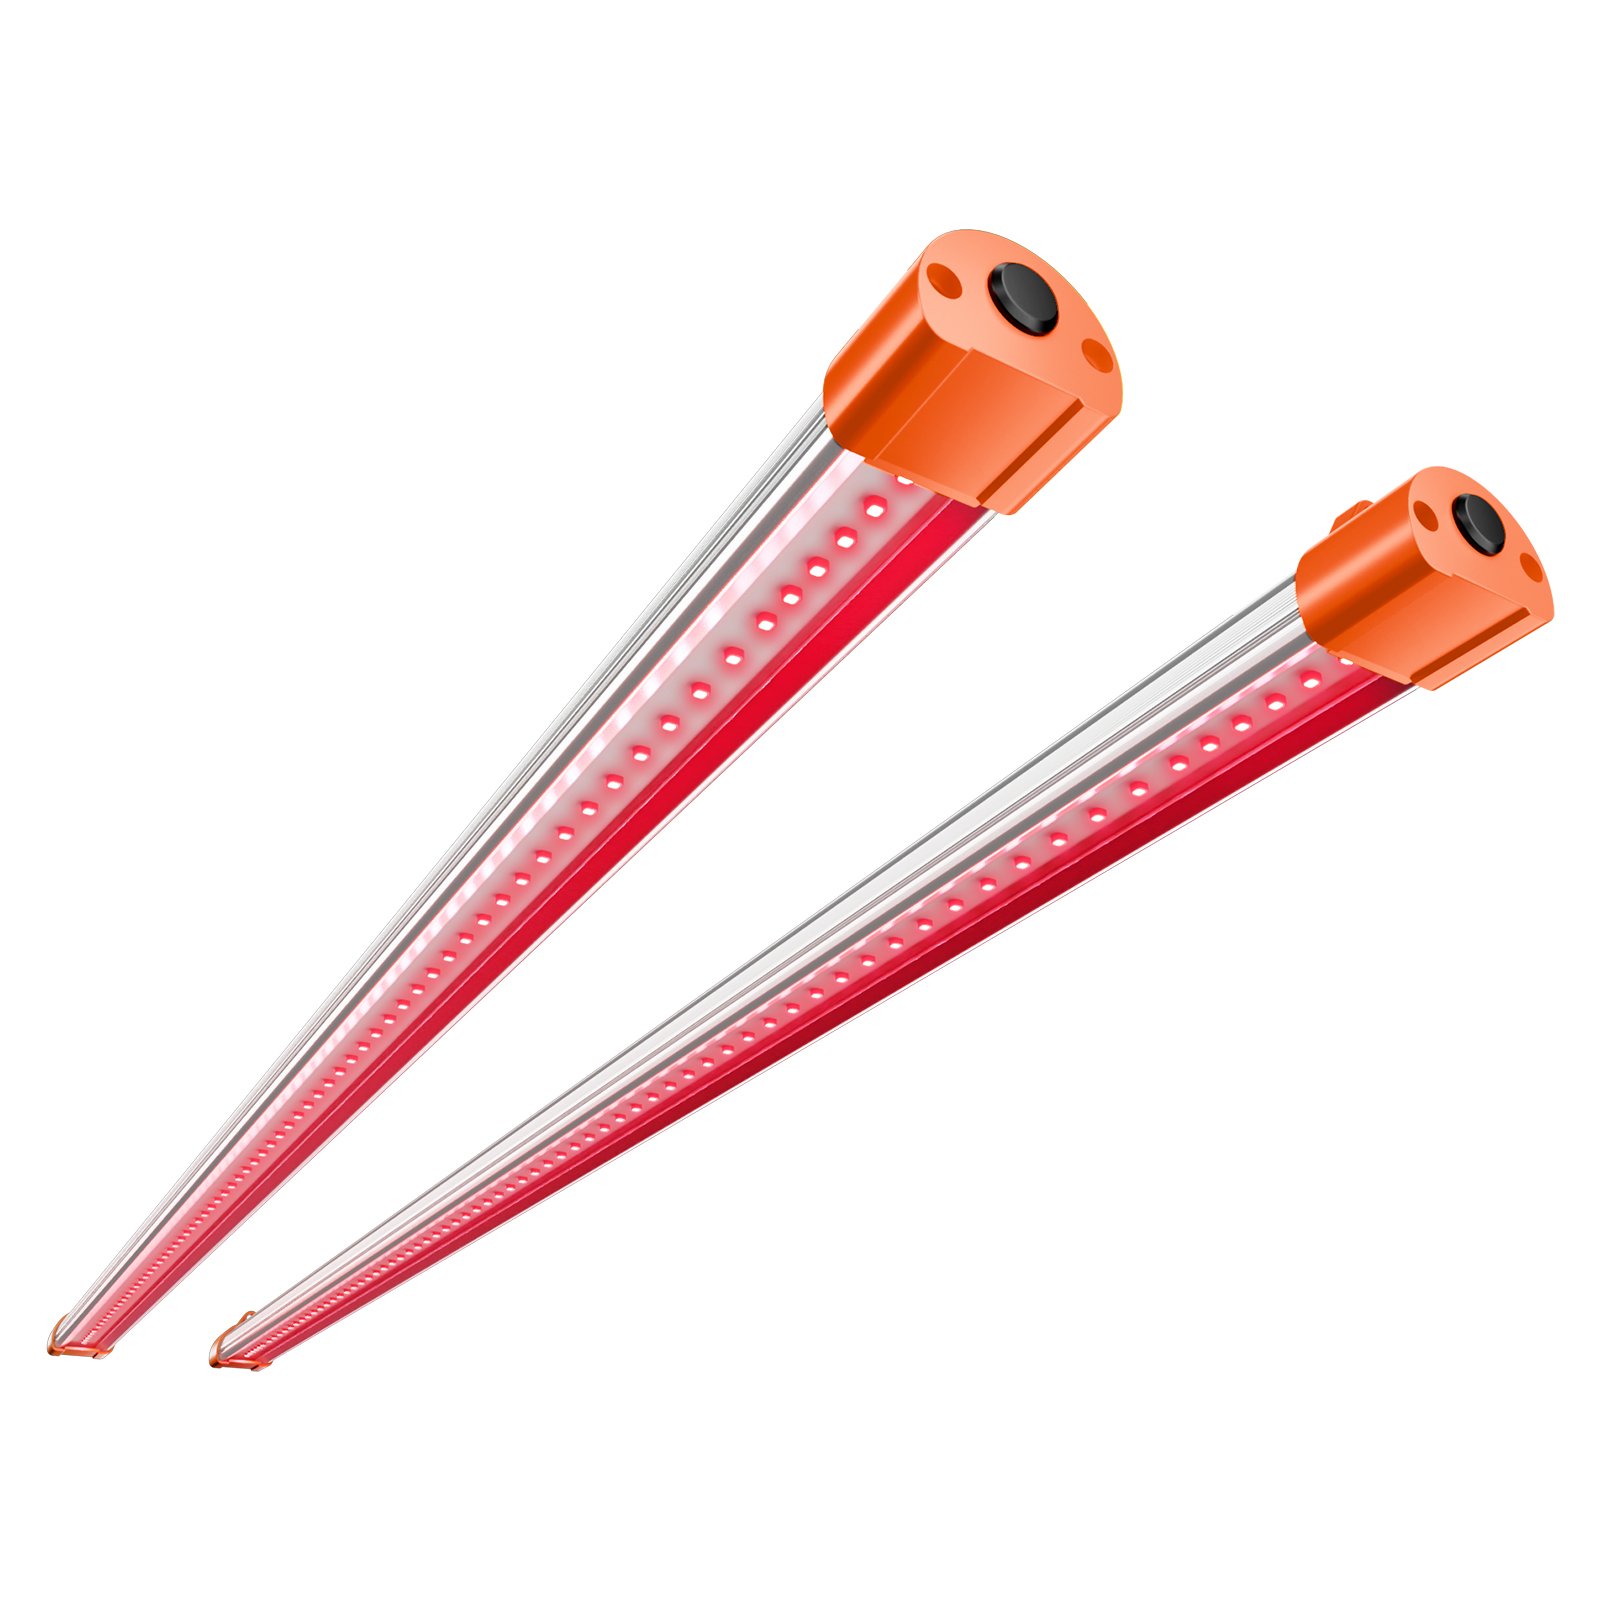

2024 Spider Farmer® Supplemental 730nm IR30 LED Light Bar Set for Plant (35.4” )
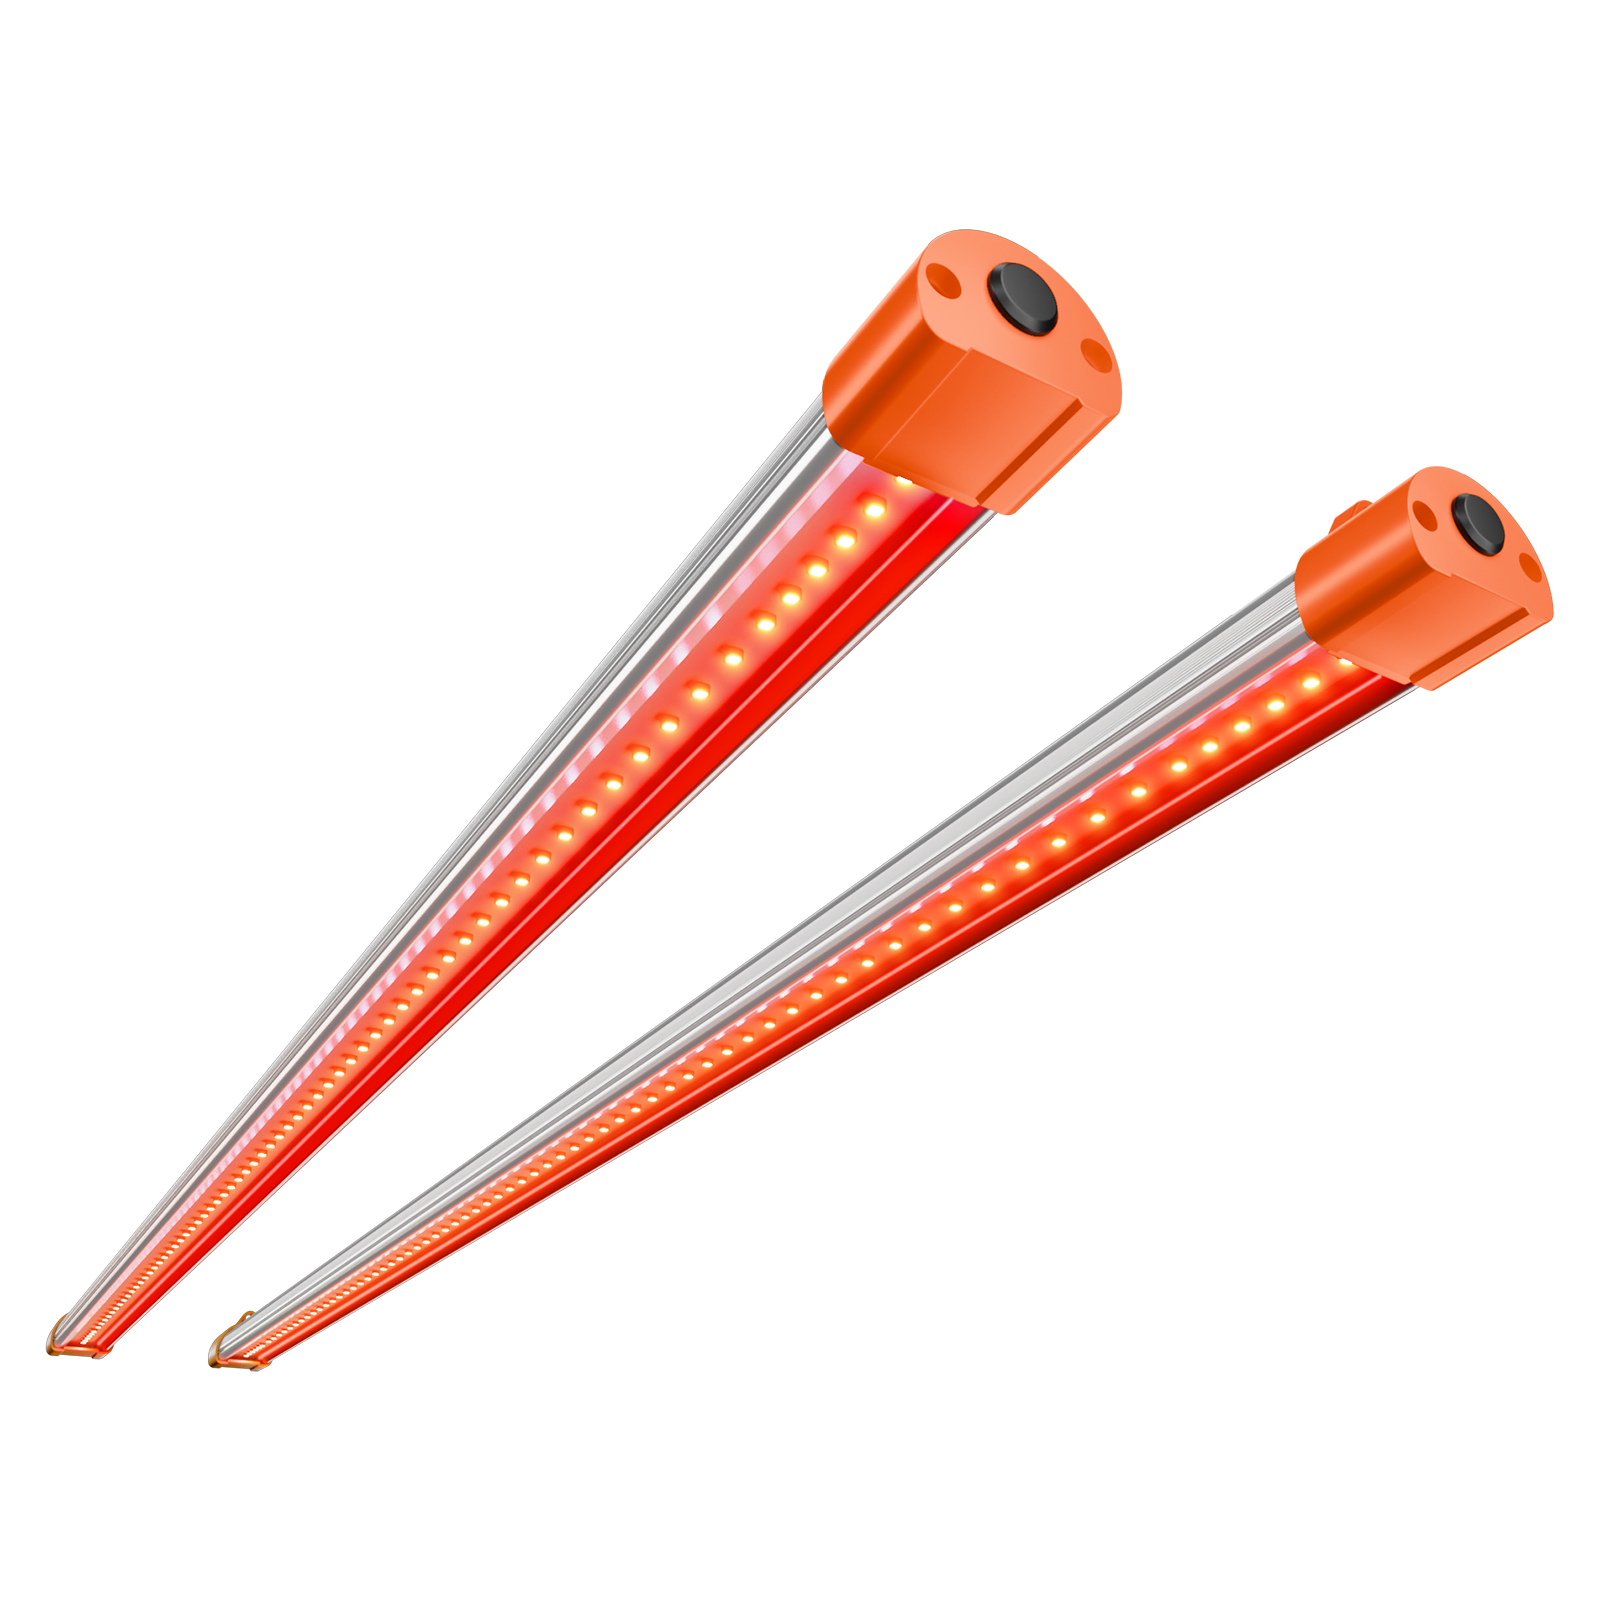
2024 Spider Farmer® Supplemental Deep Red 660nm LED Light Bar Set for Plant (35.4” )
Stage 5: Harvesting Cannabis
Before hands-on harvesting the weed, it’s beneficial to flush the plant, which involves stopping nutrient addition and providing the plants with only pH-balanced fresh water. Then here’s the question - when to harvest cannabis?
Trichome Color: Use a jeweler's loupe or microscope to inspect the trichomes on your buds. When 80-90% of the trichome heads have turned milky white, it indicates peak THC levels and the highest potency. If you prefer a more sedative effect, wait until some of the trichomes turn amber or golden.
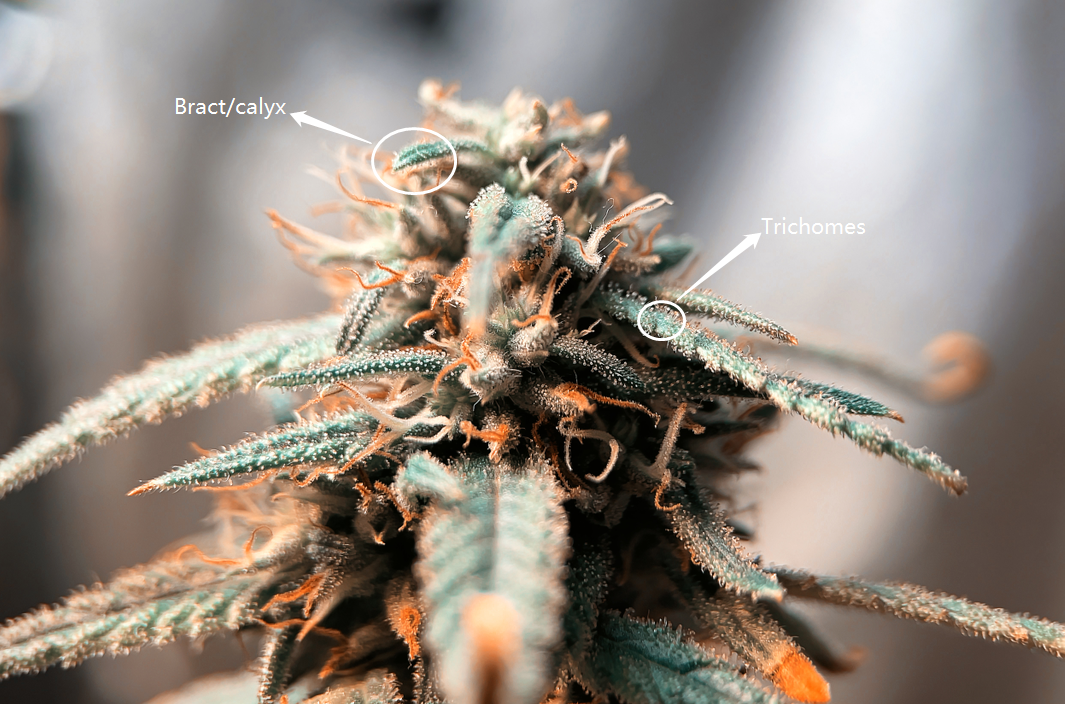
Pistil Color: Examine the pistils, which are the hair-like structures on the buds. When most of the pistils have turned from white to brown or orange, it’s another sign that the buds are mature and ready for harvest.
If you have trouble recognizing a weed plant, get to know it with our post: What Does a Weed Plant Look Like
Once you make certain that cannabis is ready for harvest, collect sharp, clean scissors or pruning shears and cut the branches just above the main stem. Be gentle to avoid damaging the buds. Then remove the large fan leaves to improve airflow. Last, carefully trim the buds from the branches, focusing on removing excess leaves and stems to prepare the buds for drying.
Stage 6: Drying & Curing Weed
So far, you’ve come across the main process of growing weed, only two post-harvest procedures remain to be done - drying and curing weed. For anyone who wants to enhance the flavor, potency, and overall quality of your buds, start with drying them:
Hang the trimmed branches upside down in a dark, well-ventilated room. Alternatively, you can place the trimmed buds on a drying rack. The room should be kept at a temperature of 60-70°F (15-21°C) with a humidity level of around 55-65% to prevent mold and mildew.
After 7-10 days of drying, you can tell the buds are ready for the curing stage when the small stems snap rather than bend and the outer parts of the buds feel dry to the touch.
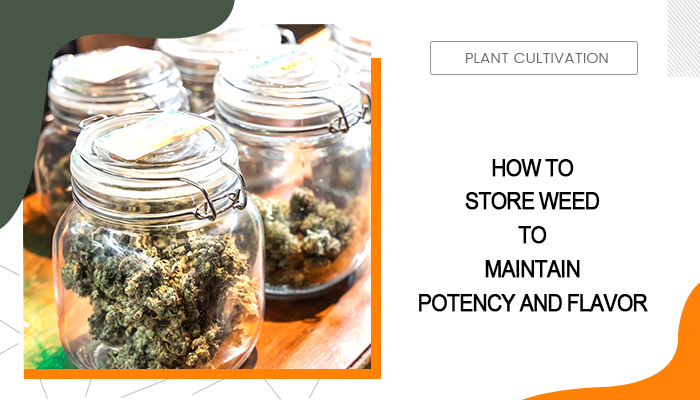
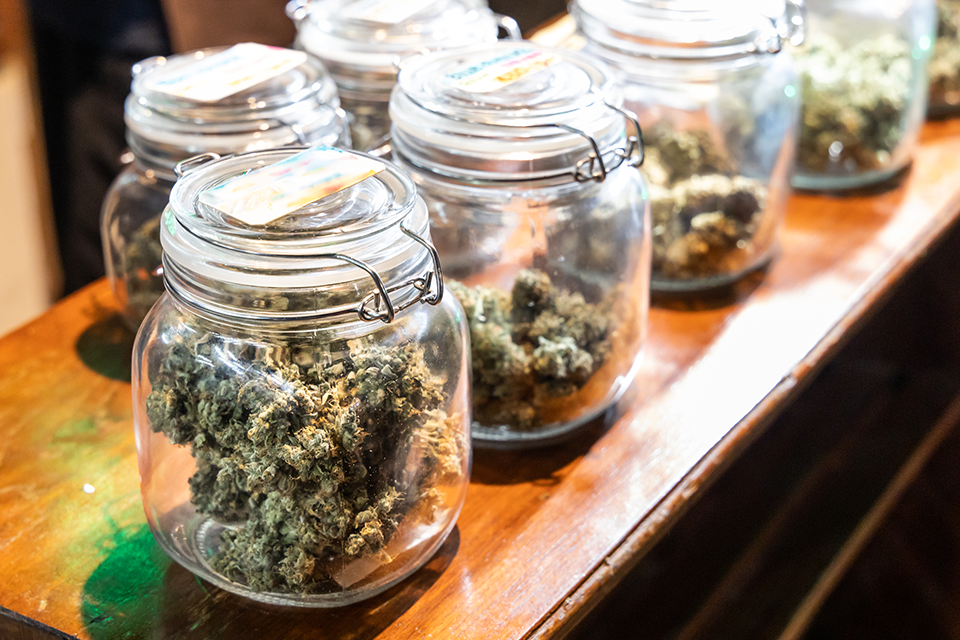
The curing process involves placing the buds in an airtight container, and maintaining a humidity level of 55-65% RH for a period of 1-4 weeks. Regularly opening the container, or ‘burping’, is essential to prevent mold by releasing excess humidity when levels exceed 65%. After curing, it's best to store the weed buds in a cool, dark place to prevent mold and mildew, allowing the cannabis to retain its potency for up to two years.
For a complete drying and curing process, refer to our guide here: How to Dry Weed and Cure It for Best Potency
Final Thoughts
That’s it! The tiring yet promising process of how to grow weed. From setting up the grow space to planting the seeds, and finally harvesting cannabis buds, this guide depicts every detail you should know about a successful marijuana growing experience. We fully understand how complex it is to grow weed, so we found a forum where you can connect to other fellow growers worldwide. If you have any questions regarding weed growing, never hesitate to leave a mark!